Use VSCode Timeline/Local File History feature to prevent accidental file deletion
There's nothing scarier in code development than deleting a file by mistake. Sometimes it can be a pop-up box, a wrong button, or a git error, and the fruits of days of hard work are gone.
It would be nice to have a feature that could record every version of your saved code locally and retrieve it at any time, so you wouldn't have to worry about losing files by mistake.
In VSCode, this used to be done by installing plugins (such as the Local History plugin), but after version 1.44, VSCode has a built-in Timeline feature. This article will look at how to use the Timeline feature to prevent the loss of files by mistake.
Use
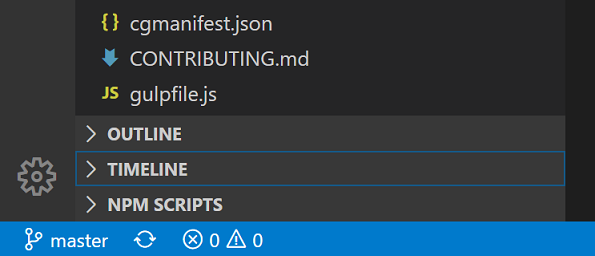
When you open a code file, a "TIMELINE" panel will appear on the left side, below the file panel, which is the timeline.
After the file has been modified and saved, a new node appears in the timeline, which is the history version of the code file.

In addition to "Save", Git commits, file renaming, and other actions are also displayed in the panel as a version.
Clicking on a version will bring up a comparison screen with the current file, so you can see what has changed from the historical version to the latest version.
Right-clicking on a version reveals a series of menus.
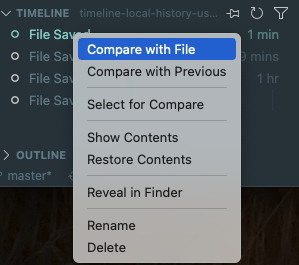
These menus are (for Mac systems, for example)
- Compare with File Compare with current file version
- Compare with Previous Compare with Previous Version
- Select for Compare selects the current version as a comparison version (you can select another one in the file tree or in the TIMELINE panel to compare the two versions)
- Show Contents shows the contents of the selected version
- Restore Contents Restore the contents of the selected version
- Reveal in Finder Show the selected version of the file in the file manager
- Rename Rename the selected version
- Delete Delete the selected version
Click the Filter button on the right side of the TIMELINE panel to select the types of records that will be displayed in the panel, which currently includes local file records and Git commit records, which can be displayed on demand.
If you only check the Git commit record, you'll be able to see the Git commit history of your files, which is very convenient.
Retrieving Deleted Files by Mistake
If a file is deleted by mistake, it won't be displayed, opened, or found in the TIMELINE panel in VSCode. But in fact, although the file has been deleted by mistake, its historical version is still present locally.
To retrieve the deleted file, you can simply create a new file with the same name in the same directory, and then open the TIMELINE panel. The deleted file will appear in the TIMELINE panel, and you can restore it by right-clicking on it.
That's it! The deleted file is restored. But if you don't remember the name of the file you deleted, it can be a bit tricky to find it.
We can first find a file, any version of any file in the same project is fine. And then open the selected version file in the File Manager by right-clicking on it, so that we can find the folder where VSCode keeps the history versions. On a Mac system, for example, the path is as follows.
/Users/xxx/Library/Application Support/Code/User/History/61e8902The History directory is the directory where all the history versions are stored, so we just need to search by keywords to find the corresponding files.
For example, if we are looking for the keyword DbConnection, the search command can be found as follows
sh
# Mac / Linux
grep -r DbConnection "/Users/xxx/Library/Application Support/Code/User/History"

# Windows
findstr /s /i DbConnection "C:\Users\xxx\AppData\Roaming\Code\User\History"
Once you have searched the results, you can open the corresponding files, check them one by one and find the version we need.
Summary
Timeline is a simple and convenient feature, with it you don't need other plug-ins to save all the file history, so you don't have to worry about losing code due to accidental file deletion anymore.